4 Jul 2006
Top Five Tips for Successfully Firing A Clay Pizza Oven.
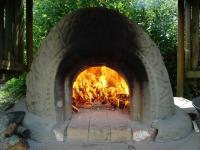
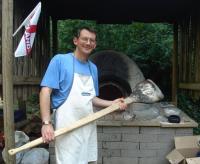
 There was a song in the charts when I was a kid called “You’ll Always Find Me In The Kitchen At Parties”, by Jona Lewie. Rather than being found in the kitchen, I tend to be found tending the clay pizza oven. Having built a few of the things, and also having arrived in places where a clay oven has been made but no-one quite knows what to do with it, I tend to end up being the one with the singed eyebrows. Having spent last Saturday making pizza at my kids school fair in their clay oven, I thought I might pass on my thoughts as to what ensures a successful firing and a good long baking session.
 A clay pizza oven makes the best pizza you will ever eat. Being baked directly on the stone and with the radiant heat from all around they cook quickly and consistently, and somehow manage to retain more moisture than any other oven allows, meaning that the dough remains light and fluffy, like a cloud plucked down from the sky. If you have never had pizza cooked like this you won’t know what I mean until you try it, and if you have had it you’ll currently be nodding in recognition.
 Kiko Denzer’s book Build Your Own Earth Oven is an excellent guide to the topic, with which I built the first pizza oven I ever made. Subsequently I did a course with Ianto Evans, who showed some additional techniques which allow you to build such an oven that you can bake in the same day as you make it (my first one took weeks to dry sufficiently to fire it). Anyway, this piece is more about how to fire them correctly than to build them, so here we go.
**Timing.**
Start 3 hours before you want to cook, aim for the last half an hour of that time being a bed of embers which you don’t feed.
**Feeding the Fire – little but often…**
Start the fire with some scrunched newspaper and kindling, as you would for a normal fire. Get a good fire going and build it up. You should be aiming to feed it little and often, with wood no larger in dimension than a couple of inches wide. No logs or chunks of wood. Your wood must be dry, and if you are using offcuts, be careful not to put in anything with paint or varnish, or any kinds of plywood or chipboard. In Italian ovens they use faggots of willow, which burn fast and hot.
**Don’t Overload the Oven.**
If you over load the oven the flames all start to pour out of the door, and over time this will weaken to top of the arch, so is best kept to a minimum. Also, depending on the height of your roof covering, it can be a safety issue to have lots of flames pouring out of the door. Little and often is the rule. I’d chuck 5 or 6 bits of wood in every 10-15 minutes, and if too much flame start pouring out just give it time to calm down before you feed it any more.
**Aim for a Bed of Embers.**
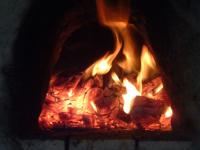
Your aim is that after 2½ hours you have a bed of embers 2 -3 ” deep across the entire base of the oven, right up to the sides. Rake it flat and for that half an hour don’t feed it with any more wood. It is one of the most beautiful phases, the way it glows and pulses makes it seem almost alive.
**Keep it Flaming…**
Then, after half an hour, scrape about two-thirds of the embers out, dispose of them safely, and rake the rest over into one side of the oven. When I first used these ovens I thought you should take out the whole fire, and use a door to keep the heat in. I did this for the first few times, but found after an hour or so the temperature started to fall, and it took longer and longer to cook the pizzas. An Italian friend of mine told me how it is done in Italy, and it has stood me in good stead ever since. The tip is simple, you want to keep the bed of embers at the side flaming. It is amazing how long it will extend the baking time. This Saturday for example, I had a box of very dry wood I had slip down to the size of pencils which I just kept feeding in, and kept a good flame going. After about an hour and half to two hours, the heat starts to drop, then you just move your bed of embers to the opposite side, get it flaming again, clean the base ready for baking again and off you go.
 That’s about it really. Another nice thing you can do is when you take your embers out, and before you put in your first pizza, put a big bunch of freshly cut rosemary in to saturate the inside with the oils and to flavour your baking. This is especially good if you make a batch of foccacia before you make pizza (recommended), you can also put rosemary on the top of that. Remember also to make your pizzas with thin bases, and don’t put too much sauce on them (that makes the dough too soggy and it can stick to the bottom), and always flour your peel (the big spatula thing for taking pizzas in and out of the oven) to allow you pizza to easily slide off the peel and into the oven. Happy baking!
Roy Herold
6 Jul 11:45am
Hi there!
Having used wood-fired pizza ovens in the catering trade over many years, I know the value of using them! Although I love pizza (and baking bread in the oven, apart from focaccia) my personal favourite is roasting whole linefish or Greek style lamb!
Although I have used many ovens in various restaurants over the years, I have never built one myself, mainly because of the methods that I have seen used being quite costly and involving arcane calculations i.r.o. the volume of the oven and the width of the flue, etc. Also – all the ovens that I ave sen have been built from fire-bricks and fireclay, and the drying-out process and intial firing also seemed beyond someone with no experience. You seem to have taken to this lke a duck to water – and you very coyly mention the tips that you learned that enabled you to build and fire an oven on the same day.
Any chance of my being able to learn this? I am looking towards building my own home at a point not too far in the future – and I will be building in cob (pretty much adobe, or wattle & daub) Iw oudl value any info that I can get!!
Roy Herold
Garden Route
South Africa
parker
5 Jun 10:36am
beautiful work on your oven am building my first oven right now if i have questions may i write you for advise if i have trouble will send pics when done . thanks parker